Share this article! Here's a short link you can use: http://im.vu/help913
To join the Discussion about IMVU Studio, check out the official Discussion page here!
Click here to download IMVU Studio and find IMVU Studio Tutorials.
We are offering IMVU Studio as an early Beta, introducing several new features including normal and specular maps and a fresh new user interface.
This article will give you a quick overview of what’s new and what has changed from Classic Create Mode.
The underlying structure of how products are created has remained the same in IMVU Studio. About 90% of existing products in our catalog will be derivable into Studio. If you are familiar with Classic Create Mode in IMVU Classic (IMVU Client), you should be able to start creating products in IMVU Studio in no time.
New Home Mode
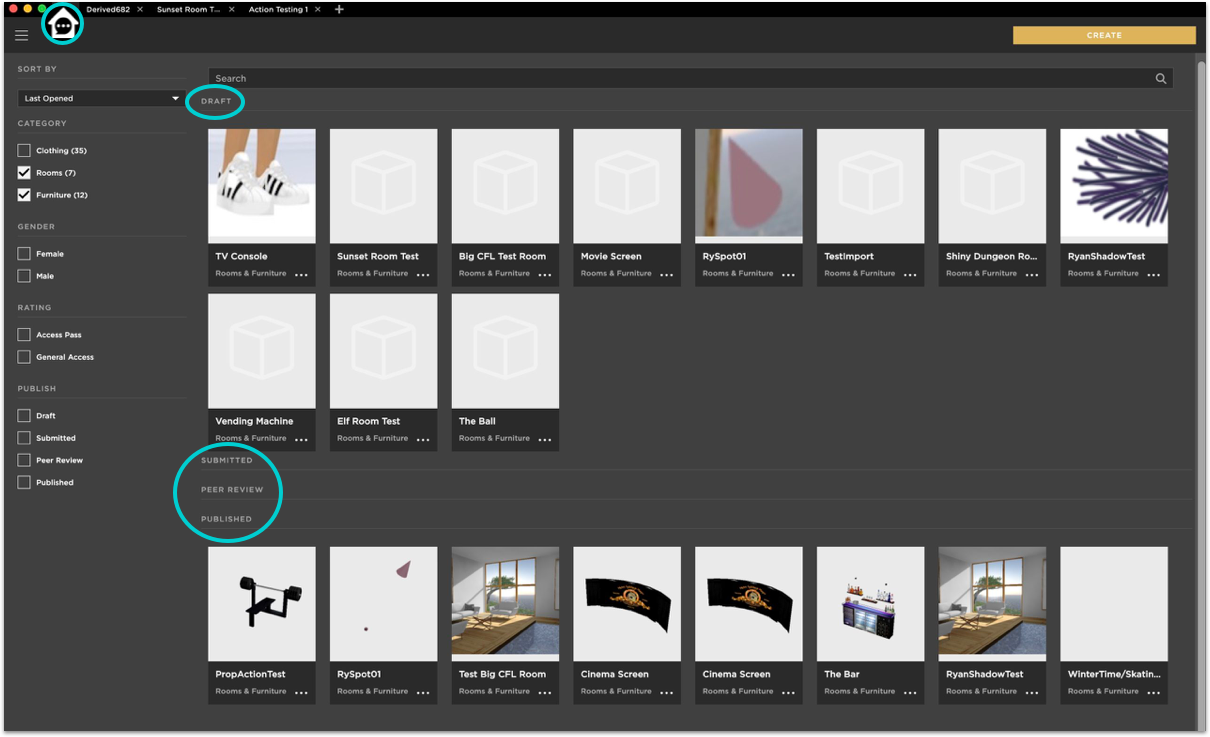
After logging into IMVU Studio, you will be taken to your “Home” which lists all your existing products. They are sorted into four main categories representing their publish state.
DRAFT – Unpublished products that reside locally on your computer. If this is your first time opening Studio, you will not have any draft projects.
SUBMITTED – Products that have been submitted for publishing, but have not yet started peer review.
PEER REVIEW – Products that are currently in peer review
PUBLISHED – Products that have been published
Searching Your Projects
SORTING – From the left side navigation, you can sort your projects by the last project you opened, the last project you saved, or alphabetically.
FILTERING – Filter your product list by Category, Gender, Rating or Publish status.
You can always get back to your Home by clicking on the HOME tab in the upper left.
Open an Existing Project for Editing
For Drafts
Click on a draft project to continue editing your draft.
For Published Products
Click on a published project to edit it for republishing.
This will create a draft of your published product and tie to its product ID. When you publish this draft, it will re-publish over the existing product.
Create a New Product
To start creating a new product, click on the “CREATE” button on the top right, or the “+” button next to the tabs.
This will open the product catalog where you will choose the base product you want to derive from.
New Derive Mode
Product catalog
We have embedded the IMVU product catalog into IMVU Studio. It is very similar to the shop in IMVU Desktop. Here you can browse for the perfect base product to derive from and start creating.
Every time you want to create a new product you need to derive it from an existing one first. Deriving means to create a copy of a product and base your new product starting with this copy.
Select a product by clicking on it. A 3D preview will load in the upper right corner of the screen. You can view the product full screen as well by clicking the icon in the preview window.
Derivation Chain
The full derivation chain is displayed on the right and includes each product’s cost in credits. Any product in the derivation chain can be selected if you find a simpler or less expensive product to derive from.
Categories
Narrow down the product you are searching for by selecting a category on the left side of the screen. These categories match both IMVU Desktop and IMVU Mobile.
The top selection in any category will always be the available IMVU base products and empty derivables.
Product ID
If you know the Product ID you are searching for, you may enter it in a dedicated field.
Search
Type anything in the search field and it will filter by the product’s title or keywords.
Once you’ve found your base product, click on the “DERIVE” button in the lower right. A draft project will be created and it will open in Edit Mode.
The catalog will only show products where the owner has allowed derivation.
Preview
If you are familiar with Classic Create Mode, the preview button has the same function as “Apply Changes”. After any edit, import or parameter change, you must click PREVIEW to render the changes in the 3D window.
Component Panel
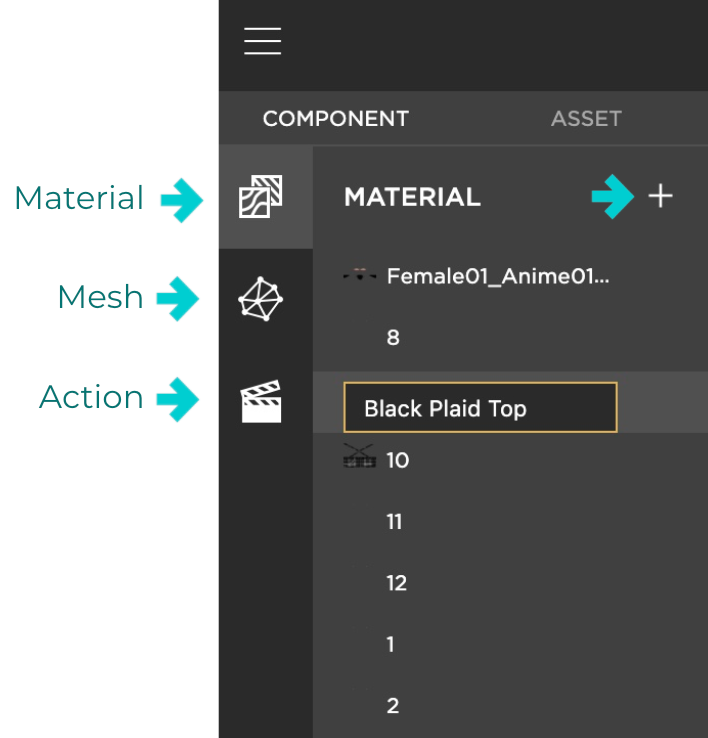
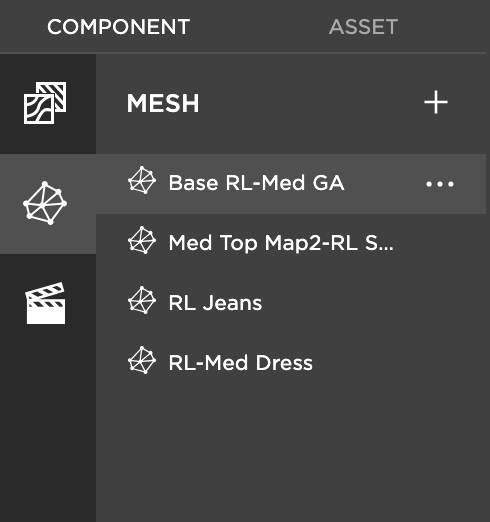
On the left hand side we’ve organized the types of components that make up a product: Material, Mesh, Action, Skeleton, and Environment. Selecting any component on the left will bring up its parameters in the inspector panel on the right.
Add a new material, mesh or action slot by clicking the “+” button.
- Rename any material, mesh or action for better organization of your project. Just double-click on the name to rename
- You will only see the Environment component if you derive from a Room product
- You will only see the Skeleton component on an avatar or other products where the skeleton has been modified
Material Component
Normal & Shininess Maps
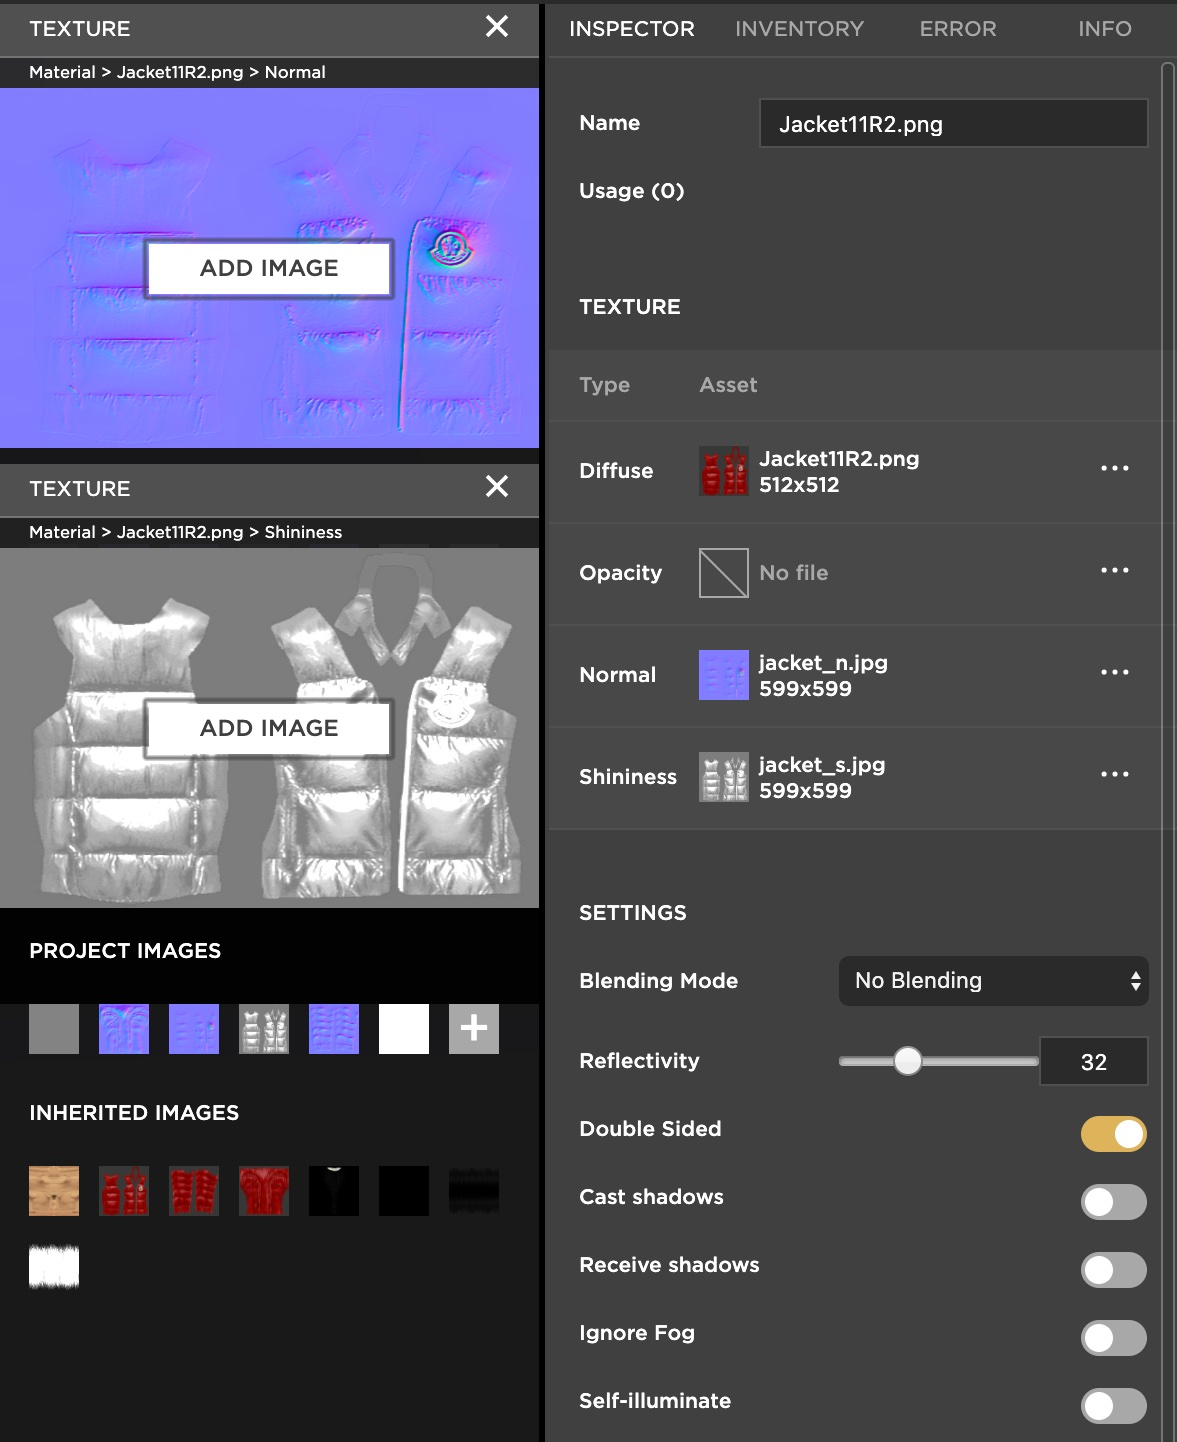
There are two new textures and a new parameter in the Material component needed to create bumpy and shiny surfaces.
Normal Map
This is a more modern type of bump map that allows you to add surface detail such as bumps, scratches and irregular surfaces to a model. The map defines depth in 3d space by using the color channels as xyz coordinates.
You will need to generate a Normal map either from your 3d modeling software or by simulating it with a Photoshop filter, or an online tool like this one.
Shininess Map
This is a greyscale map that defines if light will be reflected off of a surface. White parts of the map define more reflection, dark parts define less.
Here’s a shininess map example with full white on the blotch, and full black everywhere else.
Reflectivity
This is the slider value from 0 to 100 that defines the fresnel reflectivity. It’s basically the angle from the light to the camera that light will reflect. A normal map must be loaded for the reflectivity slider to be active.
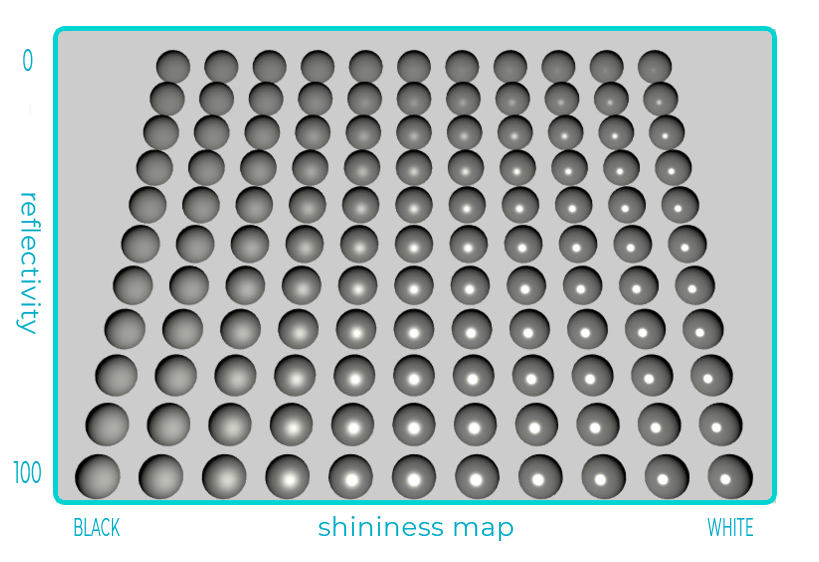
In the example below, the Reflectivity value ranges from 0 at the top to 100 at the bottom.
The Shininess Map value ranges from “black” at the left to “white” at the right. You can achieve an array of simulated surfaces with just these three parameters.
You will only see normal and specular effects in rooms that contain a dynamic light (directional light or point light), and where the ambient light is not turned way up.
Cast and Receive Shadows
Sit tight. These will become useful when we roll out spotlights with shadows. You will be able to define which materials can cast and/or receive shadow.
Learn more about the Material Component here.
Mesh Component
For advanced users, there is a new “Mesh” component. Looking at the Mesh inspector panel, you will notice we now list the submeshes and you can reassign materials to each sub-mesh. This is useful if you want to assign the same material to multiple submeshes, saving memory and file size.
Learn more about the Mesh Component here and the Inspector Panel here.
Persistent Pop-up Panels
Throughout Edit Mode are several pop-up panels that hold various parameters and selections. These panels can stay open as long as you need to reference them and multiple panels may be open at once.
In the example below, two ensemble popups are open side by side.
Importing Assets
Via Asset Panel
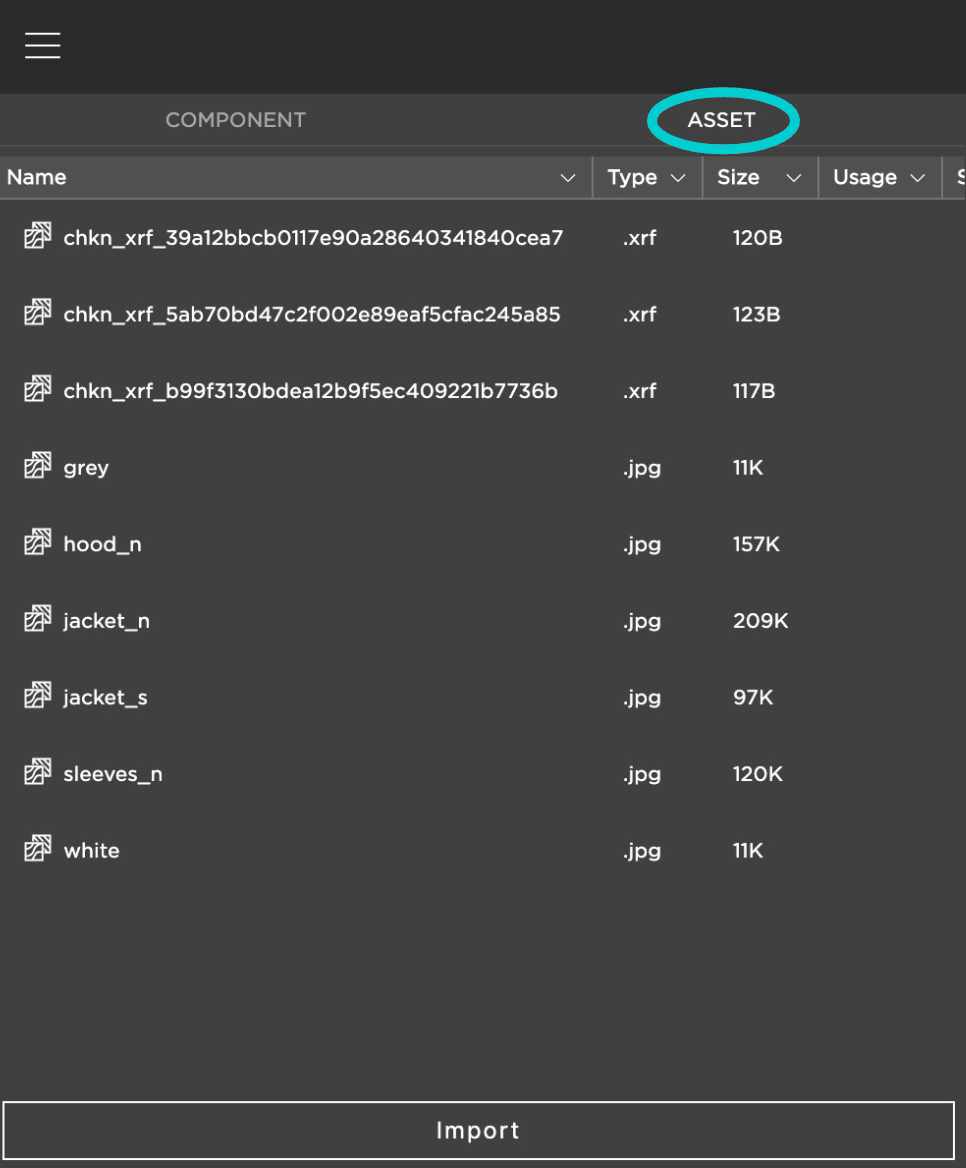
Next to the Component Panel tab is the Asset Panel. From here you can view details and import any asset into your project for later use.
Supported Assets:
- Textures – jpg, png
- FBX – all types (preferred import method)
- Meshes – xmf (legacy Cal3D format)
- Animations – xaf (legacy Cal3D format)
- Morph Animations – xpf (legacy Cal3D format)
- Skeleton – xsf (legacy Cal3D format)
Select IMPORT at the bottom of the panel.
Via Inspector Panel
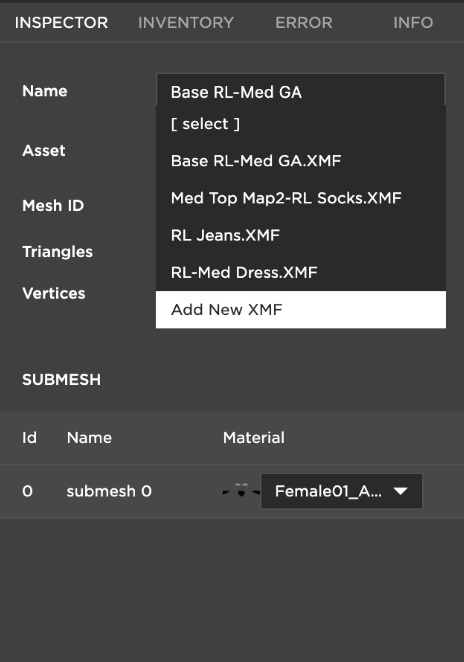
Cal3d files can be imported directly into a Material, Mesh or Action. For example, to import a .xmf file, first select a mesh slot or create a new one.
Now in the Mesh inspector panel, select the Asset dropdown menu. Then select “Add New XMF”
Inventory Panel
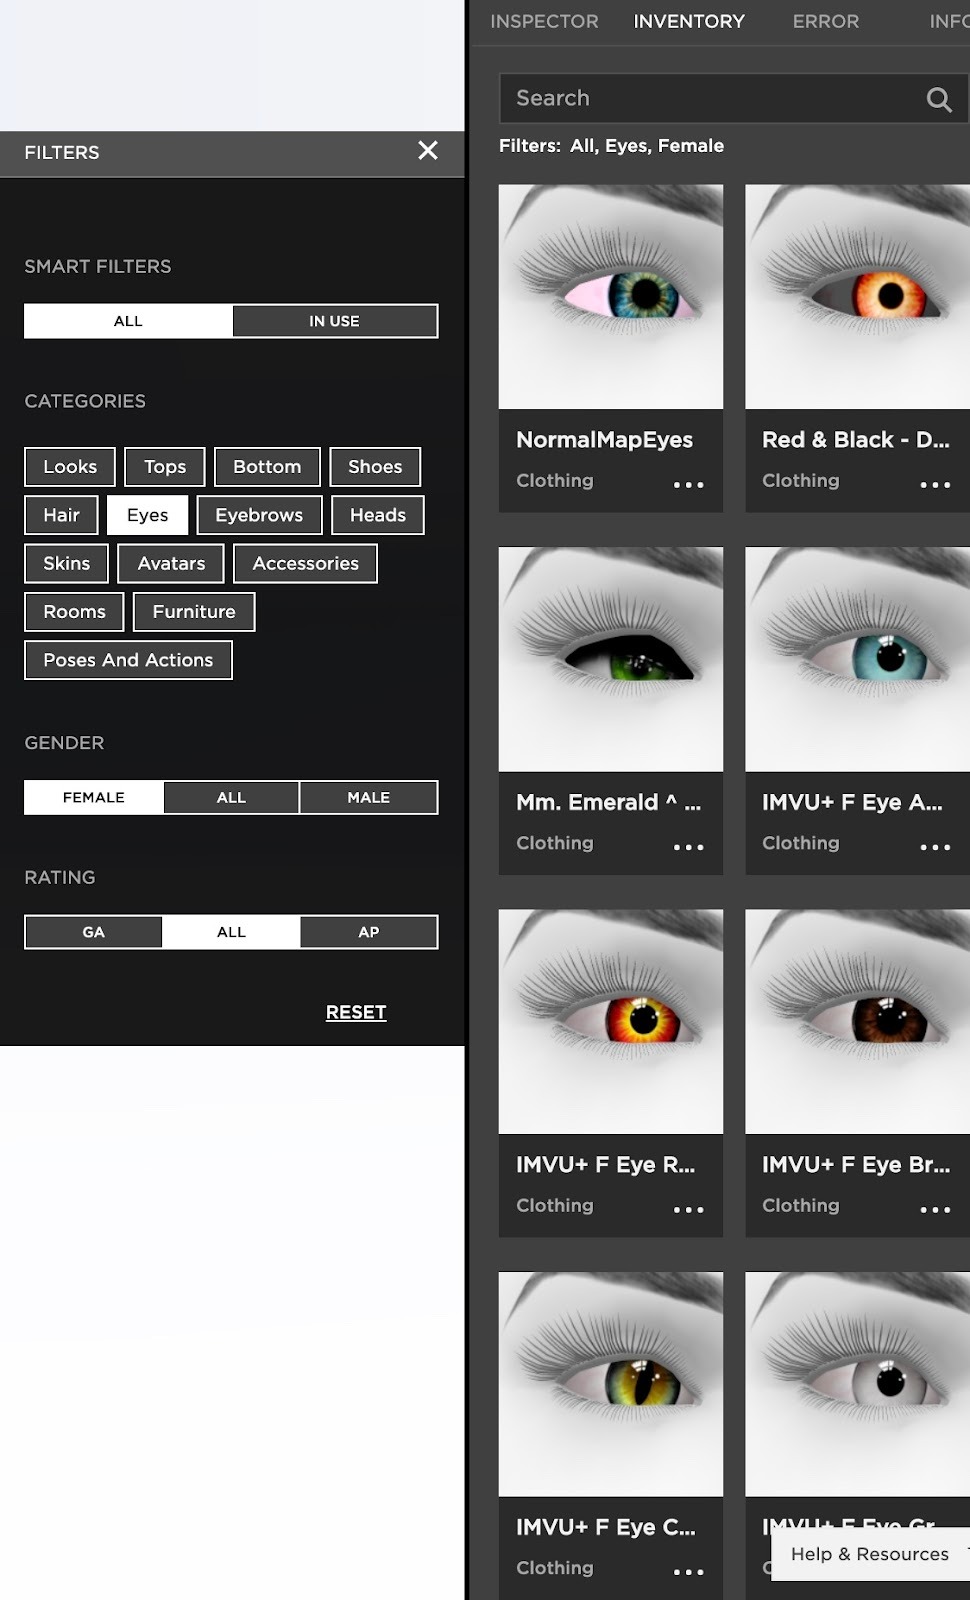
Use the Inventory panel to try on clothing, furniture or room products that you are not editing. You can filter for your inventory by opening the popup panel.
Was this article helpful?
That’s Great!
Thank you for your feedback
Sorry! We couldn't be helpful
Thank you for your feedback
Feedback sent
We appreciate your effort and will try to fix the article
